
The Importance of Efficient Tourism Tent Installations
Tourism tent installations are essential for providing a unique and luxurious guest experience while minimizing environmental impact. Whether you’re setting up a lavish glamping site or a high-end resort, proper installation ensures safety, durability, and comfort.
To get started quickly, here’s a snapshot of the process:
1. Choose the right location considering terrain and accessibility. 2. Gather essential tools and materials. 3. Prepare the site by clearing and leveling. 4. Assemble the frame and ensure stability. 5. Secure the tent and weatherproof. 6. Furnish the interior for maximum comfort and utility.
I’m Shawn Shi, a passionate designer and innovator in glamping tents. With experience in tourism tent installations, I blend eco-conscious practices with luxury to create sustainable outdoor living experiences. Now, let’s dive into the first step: choosing the right location.
Relevant articles related to tourism tent installations:
- bespoke modular homes
- eco-friendly prefabricated homes
Choosing the Right Location
Selecting the perfect location for your tourism tent installation is crucial. It affects not only the guest experience but also the environmental impact. Here’s what to consider:
Site Selection
**1. Terrain: Opt for flat, stable ground. Avoid steep slopes or areas prone to flooding. A level site ensures the tent’s stability and guest safety.
**2. Accessibility: Ensure easy access for both guests and service providers. Consider proximity to amenities like restrooms, dining areas, and recreational facilities.
**3. Natural Beauty: Choose a site that showcases the natural surroundings. Scenic views improve the guest experience and promote relaxation.
Environmental Impact
Responsible tourism means minimizing your footprint. Here are some tips:
**1. Local Ecosystem: Avoid disrupting local flora and fauna. Choose sites that require minimal clearing and grading.
**2. Water Sources: Be mindful of nearby water bodies. Maintain a safe distance to prevent contamination and erosion.
**3. Waste Management: Plan for waste disposal and recycling facilities. Keeping the site clean is crucial for both guest satisfaction and environmental health.
Accessibility
**1. Transport: Ensure the site is accessible by vehicle. This is important for transporting materials and for guest convenience.
**2. Emergency Services: Consider the proximity to emergency services like hospitals and fire stations. Safety should always be a priority.
**3. Utilities: Check for availability of essential utilities such as water, electricity, and internet. These are vital for providing a comfortable and modern glamping experience.
By carefully considering these factors, you can select a site that is not only beautiful and accessible but also environmentally responsible.
Next, we’ll discuss the essential tools and materials needed for a smooth installation process.
Essential Tools and Materials
Before diving into tourism tent installations, having the right tools and materials on hand is essential. Proper preparation can make the setup process smoother, safer, and more efficient. Here’s a comprehensive checklist to guide you.
Tools You’ll Need
- Hammer and Mallet: For driving stakes and securing tent components.
- Wrench Set: Essential for tightening bolts and nuts.
- Screwdrivers: Both flathead and Phillips for various screws.
- Measuring Tape: Accurate measurements ensure proper alignment and stability.
- Level: To confirm the ground and structure are even.
- Utility Knife: Handy for cutting ropes, tape, or packaging.
- Ladder: Necessary for reaching higher points during setup.
- Safety Gear: Gloves, safety glasses, and hard hats for protection.
Materials to Gather
- Tent Fabric: Ensure it’s durable, weather-resistant, and suited to your climate.
- Frame Components: Typically made of rust-proof steel or aluminum for longevity.
- Anchoring Stakes: Strong stakes for securing the tent to the ground.
- Ropes and Bungees: For additional securing and tensioning.
- Groundsheet: Protects the tent floor and provides insulation.
- Weatherproofing Supplies: Sealants and waterproof sprays to improve durability.
- Fasteners: Bolts, screws, and other connectors specific to your tent model.
- Padding or Platform: Foam or wood to lay the tent on, preventing direct contact with the ground.
Preparation Checklist
- Inventory Check: Ensure all tools and materials are available and in good condition.
- Site Inspection: Double-check the site for any obstacles or hazards.
- Weather Forecast: Check the weather to plan for any adverse conditions.
- Team Briefing: If working with a team, ensure everyone understands their role and the installation steps.
- Safety Measures: Set up any necessary barriers or signs to keep the area safe.
Pro Tips
- Label Components: Mark frame parts for easier identification during assembly.
- Backup Supplies: Always have extra stakes, ropes, and fasteners on hand.
- Dry Run: If possible, practice setting up the tent in a controlled environment to familiarize yourself with the process.
By ensuring you have all the necessary tools and materials ready, you can streamline the installation process and avoid unnecessary delays. Next, we’ll walk through the step-by-step guide to setting up your tourism tent.
Step-by-Step Guide to Tourism Tent Installations
Preparing the Site
Before setting up your tent, prepare the site properly. A well-prepared site ensures stability and safety for the structure.
1. Clearing the Area:
- Remove any rocks, branches, or debris from the site.
- Trim any overhanging branches that could damage the tent.
- Ensure the area is free from any sharp objects that could puncture the tent fabric.
2. Leveling the Ground:
- Use a rake or shovel to level the ground as much as possible.
- Check the level using a measuring tape and a level tool.
- If necessary, use soil or sand to fill any low spots.
3. Marking the Layout:
- Mark the corners of your tent using stakes or flags.
- Measure the dimensions to ensure accuracy.
- Double-check the alignment to ensure the tent will fit properly in the designated space.
Assembling the Frame
The frame is the backbone of your tent, providing support and shape. Proper assembly is crucial for stability.
1. Laying Out the Components:
- Lay out all frame components in the order they will be assembled.
- Ensure all parts are present and in good condition.
2. Connecting the Frame:
- Follow the manufacturer’s instructions for assembling the frame.
- Use a wrench set to tighten bolts and screws securely.
- Ensure all connections are firm to avoid instability.
3. Checking Stability:
- Once assembled, check the frame for any wobbling or loose parts.
- Adjust as necessary to ensure the frame is stable and secure.
Securing the Tent
Securing the tent properly is essential to withstand weather conditions and ensure safety.
1. Anchoring the Tent:
- Drive stakes into the ground at the marked corners.
- Use a hammer or mallet to ensure stakes are firmly in place.
- Attach the tent to the stakes using ropes or bungees.
2. Tensioning the Fabric:
- Pull the tent fabric taut to avoid sagging.
- Use tensioning devices like ratchet straps if available.
- Regularly check and adjust the tension to maintain firmness.
3. Weatherproofing:
- Apply sealants to seams and joints to prevent leaks.
- Use waterproof sprays on the fabric for added protection.
- Ensure the tent is properly ventilated to avoid condensation.
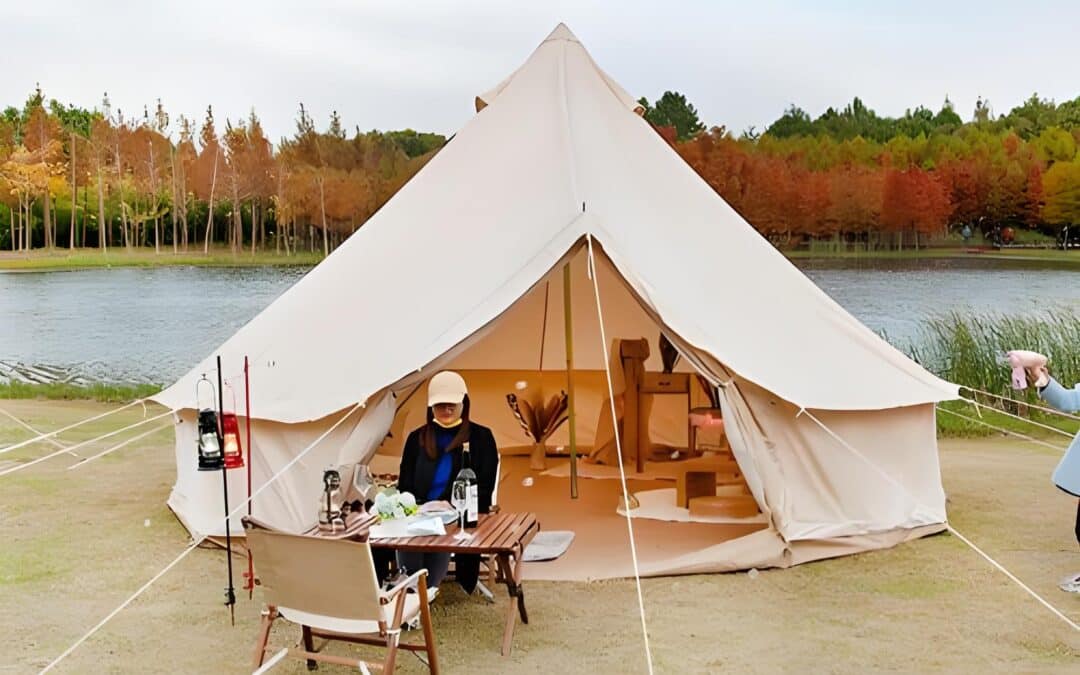
Interior Setup
Setting up the interior ensures comfort and functionality for your guests.
1. Furnishing:
- Place furniture such as beds, tables, and chairs inside the tent.
- Arrange items to maximize space and comfort.
2. Installing Utilities:
- If applicable, set up any utilities such as lighting or heating.
- Ensure all electrical connections are safe and weatherproof.
3. Adding Comfort Items:
- Lay down a groundsheet or carpet for added insulation.
- Set up storage solutions for personal belongings.
- Add decorative touches like cushions or curtains to improve the ambiance.
By following these steps, you can ensure a smooth and efficient tourism tent installation. Proper preparation, assembly, and securing will provide a safe and comfortable environment for your guests. Next, we’ll explore some tips for efficient and safe installation.
Tips for Efficient and Safe Installation
When it comes to tourism tent installations, efficiency and safety are paramount. Here are some best practices, safety measures, and time-saving tips to ensure a smooth setup process.
Best Practices
1. Plan Ahead:
- Review the tent’s instruction manual thoroughly before starting.
- Create a checklist of all tools and materials needed for the installation.
2. Use Quality Materials:
- Invest in high-quality stakes, ropes, and tensioning devices.
- Ensure all components are in good condition before use.
3. Work as a Team:
- Assign specific tasks to each team member to streamline the process.
- Communicate clearly and frequently to avoid misunderstandings.
Safety Measures
1. Wear Protective Gear:
- Use gloves to protect your hands from cuts and abrasions.
- Wear safety goggles when hammering stakes or handling sharp tools.
2. Monitor Weather Conditions:
- Avoid setting up the tent during extreme weather such as high winds or thunderstorms.
- Check weather forecasts and plan your installation accordingly.
3. Secure the Area:
- Keep the installation area clear of non-essential personnel.
- Mark off the area with caution tape to prevent accidents.
4. Use Proper Lifting Techniques:
- Lift heavy components with your legs, not your back, to avoid injury.
- Use lifting aids like dollies or ask for assistance with heavy items.
Time-Saving Tips
1. Pre-Assemble Components:
- Pre-assemble parts of the frame and other components before arriving at the site.
- This reduces the time needed for on-site assembly.
2. Use Power Tools:
- Use cordless drills and other power tools to speed up the tightening of bolts and screws.
- Ensure all power tools are fully charged before starting.
3. Label Parts and Tools:
- Label all components and tools to avoid confusion during assembly.
- Keep an inventory list to quickly identify missing items.
4. Practice Makes Perfect:
- Practice setting up the tent in a controlled environment before the actual installation.
- This helps familiarize the team with the process and reduces setup time on-site.
By following these tips, you can ensure a safe and efficient tourism tent installation. Proper planning, quality materials, and effective teamwork will make the process smoother and more enjoyable.
Next, we’ll address some frequently asked questions about tourism tent installations.
Frequently Asked Questions about Tourism Tent Installations
Where can I practice setting up a tent?
Practicing at home is a great way to become familiar with the setup process. Set up your tent in your backyard or a spacious indoor area to get a feel for the assembly steps. This will help you identify any tricky parts and streamline the process when you’re on-site.
Benefits of practicing at home:
- Familiarity: Knowing your tent’s setup will make the actual installation quicker and less stressful.
- Efficiency: Practice helps you identify the best order of operations, saving time during real installations.
- Problem-solving: Spot and solve potential issues in a controlled environment.
What is a place where people set up tents?
There are various places where people set up tents, each serving different purposes:
- Tent Cities: Often set up for temporary housing in emergencies or for large events. These can be found in areas affected by natural disasters or in locations hosting large festivals.
- Temporary Housing: Used in scenarios like construction sites, military camps, and remote work locations. These tents provide essential shelter and amenities for workers or displaced individuals.
- Emergency Shelters: Deployed during disasters to provide immediate shelter for affected populations. These tents are designed for quick setup and durability to withstand harsh conditions.

What is a touring tent?
A touring tent is designed for quick setup and frequent stops, making it ideal for road trips and short stays. These tents are lightweight, easy to assemble, and often feature user-friendly designs.
Key features of touring tents:
- Quick Setup: Many touring tents use pop-up or simplified pole systems to reduce setup time.
- Portability: Lightweight materials and compact packing make these tents easy to transport.
- Durability: Designed to withstand frequent use and varying weather conditions.
Touring tents are perfect for travelers who need to set up and take down their shelter quickly and efficiently, allowing more time to enjoy their destination.
By understanding these aspects of tourism tent installations, you can better prepare for your next trip or project. Whether you’re practicing at home, setting up in a tent city, or using a touring tent, these insights will help you achieve a smooth and successful installation.
Conclusion
Tourism tent installations are a blend of practicality, sustainability, and innovation. Our goal at Miramar Tents is to simplify this process, ensuring that your setup is efficient and environmentally friendly.
Summary
From choosing the right location to securing the tent, every step in the installation process is crucial. By following our guide, you’ll ensure a safe and sturdy setup. Practicing at home can save time and reduce stress, and knowing the different types of tents can help you make informed decisions.
Miramar Tents
At Miramar Tents, we specialize in innovative prefabricated cultural and tourism products, including luxury tents and modular houses. Our unique selling point is combining cutting-edge technology with custom solutions, ensuring high quality and sustainability for global clients. Our tents are designed for quick assembly and durability, making them perfect for various applications, from glamping resorts to emergency shelters.
Sustainability and Innovation
We are committed to sustainability. Our tents use eco-friendly materials like recycled PET and organic cotton, reducing environmental impact. We also incorporate energy-efficient designs, such as solar panels and natural ventilation, to minimize the need for artificial cooling and lighting.
Innovation is at the heart of our products. We continuously explore new materials and designs to offer the best in comfort and durability. Our tents are not just shelters; they are experiences that connect people with nature while respecting the environment.
By choosing Miramar Tents, you’re investing in a sustainable and innovative solution for your tourism tent installations. Explore our range of products and see how we can lift your outdoor experience.
Visit our website to learn more and get in touch with our expert team!
Check out our featured post: Choosing the Perfect Glamorous Tent Manufacturer: Tips and Benefits for Your Dream Event